Yesterday I was really excited at the thought of using a sandbox as a table for playing a game of Warmachine/Hordes, the impetus behind said thought was that I figured that I would write an article about making a table as cheaply as possible as a general guide for those who might want to make a table for home use, or if you wanted to make one for a game store or club. Today I will present you with some common tips that I have discovered to make the best table possible for really cheap, with some money saving tips along the way.
Disclaimer: while I have not built any tables the ways that I am describing, I have built tables more complex than this, and these are rather my general suggestions based on my experiences with more complex tables.
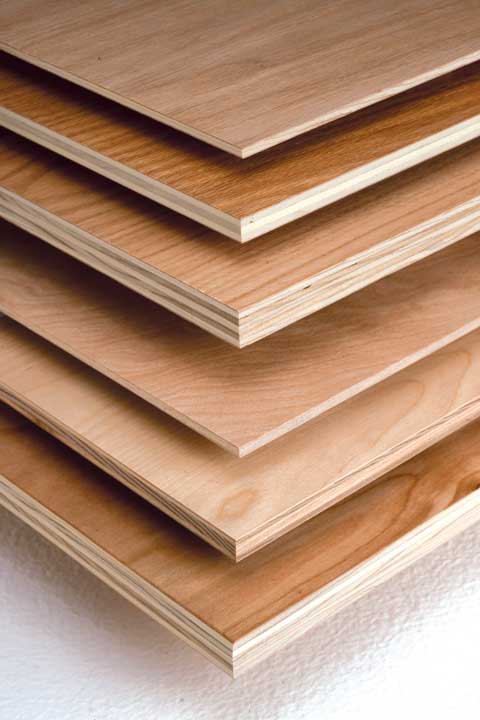 1) Base/Frame
The first thing we need to look at when building a table is a base for the table to build off of. There are several options out there:
plywood, MDF, insulation foam, and others. I strongly recommend using
plywood for your base, however, for a couple reasons. The first is that it's cheap. I've found that most 4'x8' sheets of basic plywood (unsanded, unfinished) hover around the $25 range, and most large hardware stores like Lowes and Home Depot will cut the sheet down to 2 sheets of 4'x4' (meaning you can make TWO tables!). MDF is often really cheap as well, but it's messier when cutting and it's also heavier, so it's less portable. Also, MDF doesn't respond well to liquids, typically. If you want to shape and style the board, you'll want to use insulation foam, but you'll have to get some plywood to mount the foam onto for durability.
Recommendation: 4'x8' sheet of plywood
Approximate cost: $12.50 (per board)
 2) Texture
The next thing that I would look at for a board is how to get some kind of texture, as your base is really flat and you want to approximate the texture of dirt, soil, etc. Here are your options:
sandbox sand, dirt, sawdust. The first option will give you the most authentic look, especially since sandbox sand tends to be finer quality than the kind you'll find at a beach or playground, but you'll have to spend some $$$ to buy a bag. Going outside and collecting your own sand/dirt is naturally the cheapest option, but you can generate some strange looks collecting dirt in tupperware and you can run into issues of moisture and the size of particles can end up looking too large for the 28mm scale. The cheapest option that I recommend, however, is sawdust. In any of the above options, you'll want to purchase some
wood glue to secure the particulates to your board (a 16 oz. bottle should be enough) and that usually ranges between $5-10. However, if you go to the same big hardware store that you bought that plywood from, you should be able to ask the fine gentleman nicely for a bag of sawdust. Usually they'll ask you to get a bag but they will fill it without a problem, although you might get a strange look.
Recommendation: Wood glue and sawdust
Approximate cost: $7.50 (for 16 oz. of wood glue)
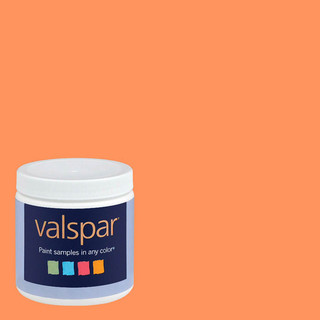 3) Paint
Most paint companies will average about 250-350 sq. ft. per gallon of paint, which means at worst, you're averaging 2 sq. ft. of paint coverage per oz. of paint. Since we'll be making a 16 sq. ft. board, that means we'll need at least
8 oz. of paint, so
paint sample sizes will be a great way to get the colors you want for cheap, and most sample sizes are 8 oz. but you could always pick up two for even coverage or to get two colors for variety (and they're only about $3 each). I don't recommend using your model paints here, as those are generally much more expensive per oz. than if you just use your usual interior paint. Also make sure to use an acrylic/latex paint or one that says can be cleaned-up using warm water and soap. Trust me, you
do not want to use paint thinner! You can also look for what is called "Oops" paint, or paints that have been mixed already but weren't to the satisfaction of the customer or were returned unused. You can usually find these for much cheaper than a usual gallon, but they're not consistently available and the price fluctuates. Lastly, it's important that you get the proper
finish for the paint too. If you want to do it cheaply, then you should invest in a
flat finish paint, as it will go further when painting and behaves better when flocking or applying other terrain details to the surface. You could consider "eggshell" or "satin" finishes, but your table will look like it's always just a little wet and glossy. If you're going for a more 'muddy' look, then that might be appropriate, but it's not for everyone.
Recommendation: 2 sample sizes of interior latex paint, flat finish
Approximate cost: $6 ($3 each)
4) Flocking
This is the often overlooked part of putting together a good board but can really make a huge different. It can even make up for spotty paintjobs or other miscellaneous errors during the rest of the process. You have a lot of options here: Games Workshop, Army Painter, Gale Force Nine, and Woodland Scenics. You'll definitely need to buy flocking for the whole table, so it's best
to find the best price for the volume, so I'd recommend Woodland
Scenics for flocking, where you can get a bag of 54 cubic inches of
flocking for only about
$8 - which is about as much as a small tub is for Games Workshop flocking!
Recommendation: Woodland Scenics turf
Approximate cost: $8
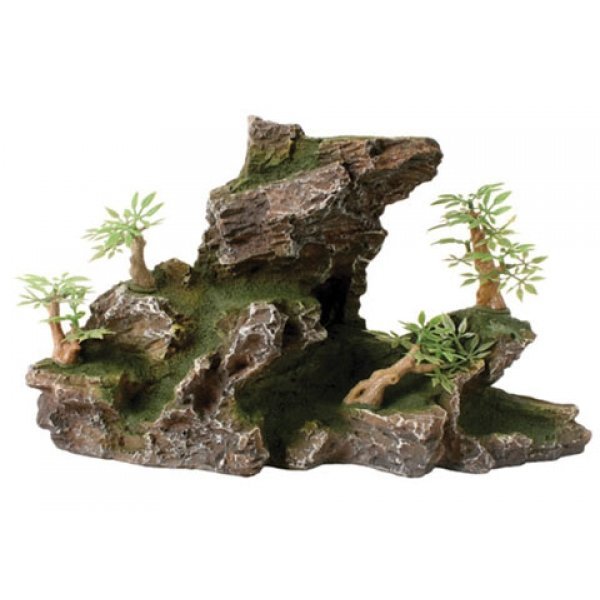
 5) Terrain
This is where most of your cost will be invested in your board. Naturally, the genre of your game that you'll be playing will largely determine what terrain to use, but for the sake of this blog, let's assume you're playing a game of Warmachine/Hordes. The terrain we'll want to use that's the cheapest, is just a typical temperate region with some trees or water. Your options here are pretty simple: Woodland Scenics, Gale Force Nine Battlefield-in-a-Box, and Games Workshop. If you're going for a specific appearance and don't mind painting your terrain pieces, then Games Workshop is a good option. Their woods look interesting but you only get one base of terrain for $28 and you still have to paint/base it, and GW flocking isn't all that cheap either at $8.25 per 5g. Woodland Scenics offers plastic trees and foliage kits, but you'll have to bend the trees to your liking and will often have to glue the foliage by hand and even paint the trees themselves if you don't want them to look like rubber. While Woodland Scenics is definitely the cheap option, it's also a lot of work.
Instead, I recommend purchasing the Gale Force Nine
Battlefield-in-a-Box terrain kits as they are often a reasonable value and are already painted for you. I own a couple of these kits and I cannot recommend them enough for those who don't have a lot of time. The only problem? These things are so awesome that they are
currently sold out! Also, since we're trying to build a table cheaply, let's see how we can save money the most. Well, if you're really looking to cut corners, I have looked into
fish aquarium terrain, as it's often fairly cheap, is pre-painted, and can offer some great visual variety. If you want forests or water features, you can also just head over to the fabric store to pick up some green and blue felt to cut out into the shapes that you want. Warmachine/Hordes doesn't worry so much about the physical objects in the terrain - only the area of coverage!
Recommendation: Aquarium terrain + felt
Approximate cost: $50 will get a good selection of terrain and felt is
really cheap.
- - - - - - - - - - - - -
Okay so let's put it all together and see how much this will all cost us.
$12.50 (base)
$7.50 (wood glue and sawdust)
$6.00 (paint)
$8.00 (flocking)
$50.00 (terrain)
Total: $84, although without terrain it only costs us $34 to make most of the table! That's not shabby at all! By saving money on our supplies and construction methods, that leaves us with lots more cash to spend on terrain, and if you budget about $100 for a table (very reasonable), then you can give yourself ~$60 to spend on some nice terrain for your board - although terrain is something that can be collected over time and expanded (just like an army).
I hope this inspires everyone to go out and put together their own table because, as you can see, it's not as expensive as you might expect!


